|
|
|
Aluminum Trim Install
Use this document to help aid the installation of the OEM décor set. Hope it helps you.
Ash Tray
- remove tray and unscrew the Phillips screw underneath, wiggle out the tray assembly, the rest you can figure out using the below figure.|
Front ashtray, removing |
|
|
|
|
|
WARNING! |
|
|
Disconnect battery ground strap before working on electrical system. |
|
|
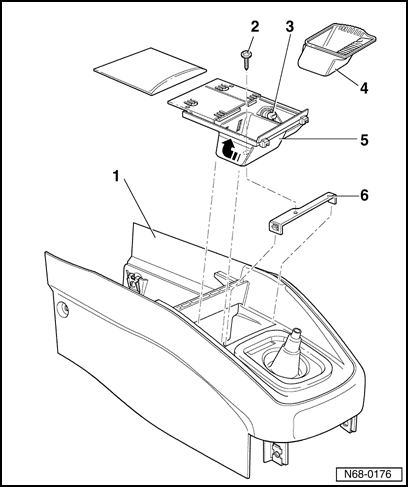
- |
Pull out ashtray insert -4-. |
|
- |
Remove screw -2- from bracket -6-. |
|
- |
Slide ashtray -5- forwards, close and pull out -arrow- until it is possible to disconnect cigarette lighter -3- connector. |
|
- |
Pull ashtray -5- out from center console -1-. |
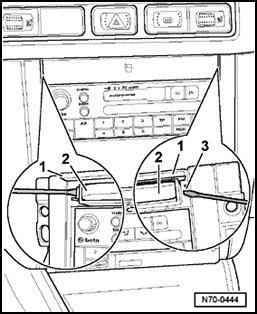
The Cup holder - their are prongs on either side of the cup holder and these act as locks use a small flat tip to unlock them and slide this out. The trim piece is also locked on, so use that small screwdriver again and gently pry up the (Tabs) side metal push fastener to release the lock and remove the old trim for both sides, insert by pushing yours on the metal tabs
|
Front cup holder, removing |
|
|
|
|
- |
Fold up trim -1- for cup holder -2-. |
|
- |
Press retaining clips - 3 - on cup holder -2- using flat screwdriver and unclip. |
|
- |
Pull out cup holder -2-. |
Door Handle Drivers side, Remove the inner door handle trim piece, pull up on control assembly and lift off, disconnect the window switches, remove the window switches from the handle cover. Re-install the same way, except snap it back on.
|
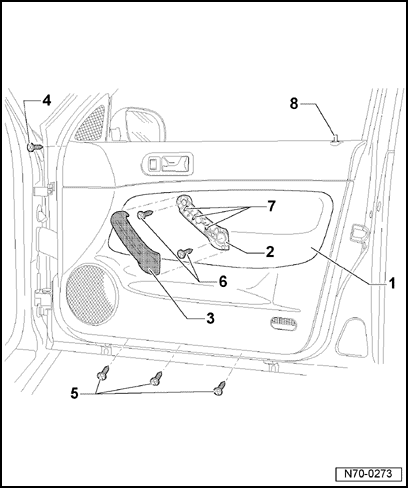
Driver's side front door trim, removing and installing |
|
Notes: |
|
Removing and installing driver's side front door trim for vehicles with manual window regulators is the same as removing and installing passenger's side front door trim |
|
Assembly overview |
|
|
|
1 - Trim |
|
2 - Grip recess |
|
3 - Trim |
|
4 - Front screw |
|
5 - Three lower screws |
|
6 - Three screws behind grip recess |
|
7 - Locking knob |
Passenger side Door Handle, pry off the outer cover by using a screwdriver to use as leverage. Come from the bottom and pull out with the screwdriver.
|
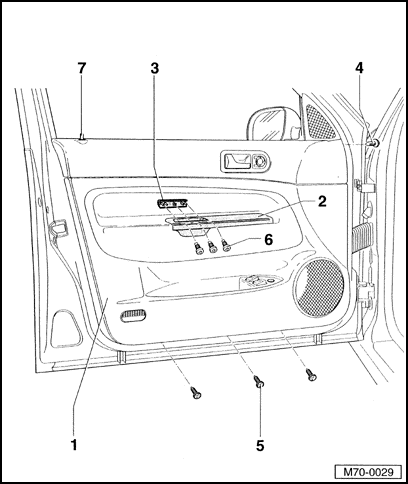
Front passenger's side front door trim, removing and installing |
|
Assembly overview |
|
|
|
1 – Trim |
|
2 - Grip |
|
3 - Trim |
|
4 - Front screw |
|
5 - Three lower screws |
|
6 - Two screws behind trim |
|
7 - Three clips |
|
8 - Locking knob |