|
|
|
Bilstein PSS9 Coilovers suspension Install
For the Golf and Jetta IV
Author
: Roger MooreDate written: 5 March 2001, updated on 17 June 2001 - with rear plastic ring for adjustable rear spring plate
Tools needed:
Metric ½" drive socket set, including 16mm and 18mm sockets Box and Open End wrench set, including 16mm and 18mm wrenches Hex wrenches, 5mm and 7mm 21mm and 23mm ½" drive sockets Rubber Mallet and 3 to 5 pound Hammer T20 Torx screwdriver 150 Ft Lbs Torque Wrench Heavy duty Large Flat Tip screwdriver Impact Wrench, ½" drive, and impact socket 23mm Spanner wrench ½" Breaker Bar 8mm 12 point adapter for ½" drive socket wrench, for CV joint output flange bolts Small wire brush Coil Spring compressor 21mm special Camber bushing socket, for use of a Hex wrench to hold Shock shaft Jack, if not using Lift Jack stands, min 2 each Micrometer that measures depth or length, I used a depth type.
Supplies Needed:
High Temperature, Anti-Seize Compound, Permatex, etc 1 Can or brake parts cleaner Silicone spray Zinc spray GP spray degreaser Liquid wrench Rags
Stock Suspension Removal:
1. Locate your wheel lug lock key from the trunk, position VW on lift or use a level surface, jack stands, open engine hood and remove the Top Plate from the camber bushings (both sides), use Impact to remove these, it is easiest (23mm socket). Loosen Lug bolts and remove the wheel locks completely while VW is on the ground.
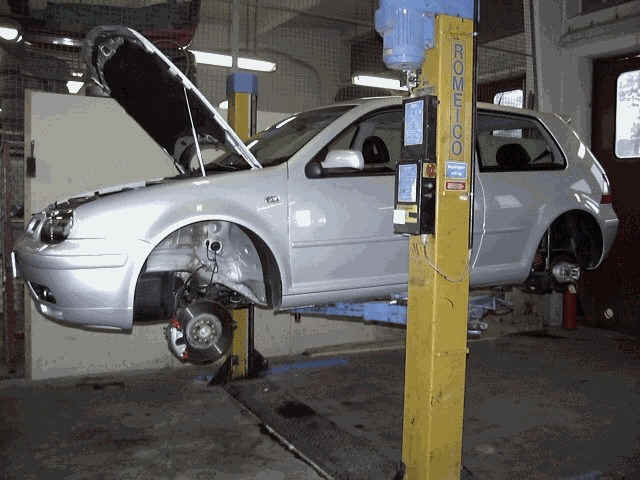
2. Raise VW up off the surface about 1 foot from the bottom of the tires, supported by lift or jack stands, remove the rest of the lug bolts and remove the wheels, keeping them grouped by SIDE (driver’s and Passenger’s) Note: Do not mix up the side of the tires. Apply Anti-Seize compound to lug bolts and screw lugs back into rotor hub, for safekeeping.
3. Let start at the passenger’s side front strut first, since it is the most difficult. Remove the inner CV joint output flange bolts on long axle, by using the 8 mm 12 point adapter. You can use the ½" breaker bar to stabilize the wheel by going across the lug bolts, and it makes removing the CV joint bolt allot easier. Allow axle to rest in the down position, remove the 18mm bolt and nut hold the bearing housing lower strut clamp. Remove all ABS wire connections from strut and move out of the way of bearing housing. Re-install the top camber bushing’s top plates to strut (finger tight only), let the strut hold the entire A-arm and front brake assembly (Normally). Apply some liquid wrench to bearing housing clamp and use rubber mallet it beat the housing off the lower end of the strut. I used also a 3 to 5 pound hammer to tap the housing also, you may need to wear some safety glasses here also and some gloves. Use the flat tip screwdriver to help spread the clamp opens a bit to allow the lubricant to work at the area. Once lower strut is out, you can remove the camber bushing top plate and remove the strut from the wheel well.
4. Driver’s side strut, re-install the top plate to the camber bushing and let hang (finger tight). Remove the 18mm bolt and nut from bearing housing, remove and disconnect the brake wear sensor and remove any wires from housing area, use the T20 Torx screwdriver to remove the bracket for the Wear sensor. Using the Mallet or Hammer, tap housing off the lower strut, use some lube and it should come off no problem. Remove the top plate and remove the strut.
5. Rear shocks and springs are easy, remove the 16mm bolts and nuts from the lower shock mounts and then remove the top 16 mm bolts from the top mounts. Let trailing arm swing down and remove the spring.
6. Group all Original suspension components together and inspect for any signs of abnormal wear or defects, could cause problems to your new setup.
Prepare the Bilstein PSS9 and your VW:
1. Clean bearing housings and clamp area of all dirt and debris, lubricate with Liquid Wrench.
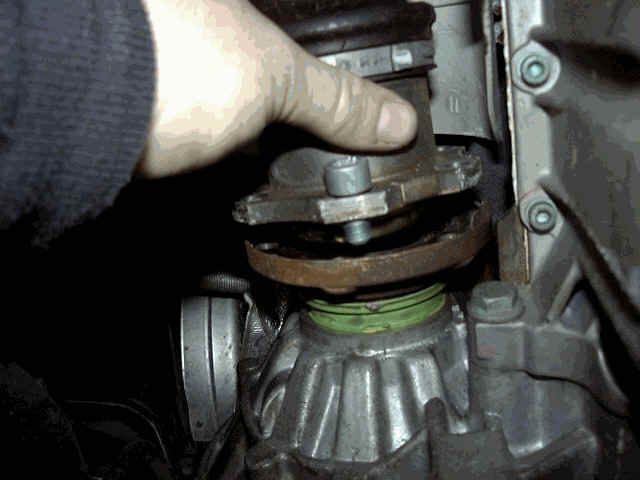
2. Remove the rear trailing arm bottom spring plate (thin sheet metal ring). I used a small flat tip to pry it up, comes off fairly easy.
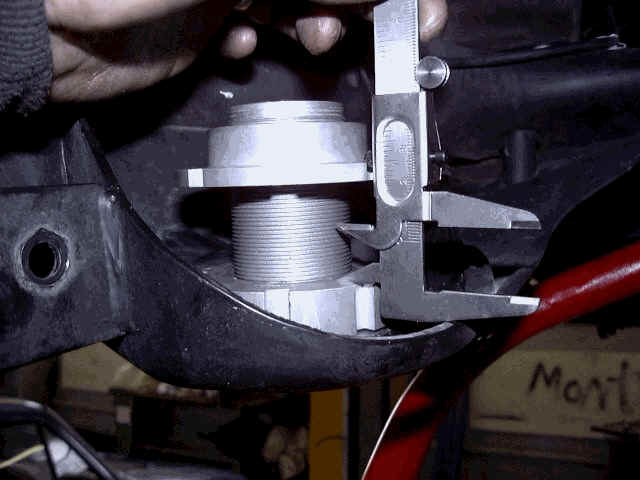
3. Apply Anti-seize compound to the threads of the Coilovers and lock ring flat edges and only apply the compound to the area in which to wish to have your set level at (The Drop). Use anti-seize on the rear height adjuster threaded shaft, I coated it completely.
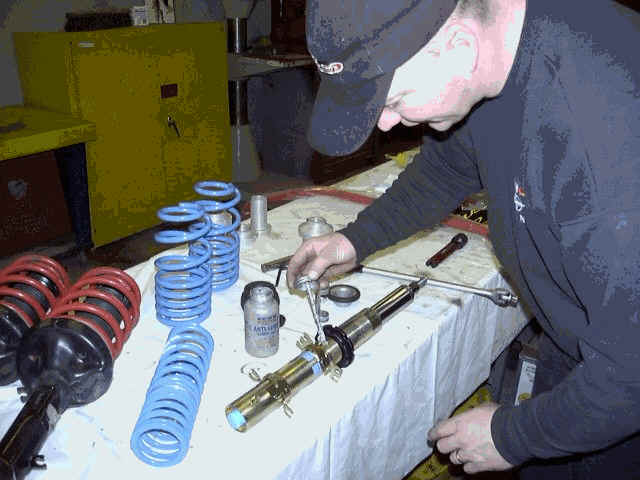
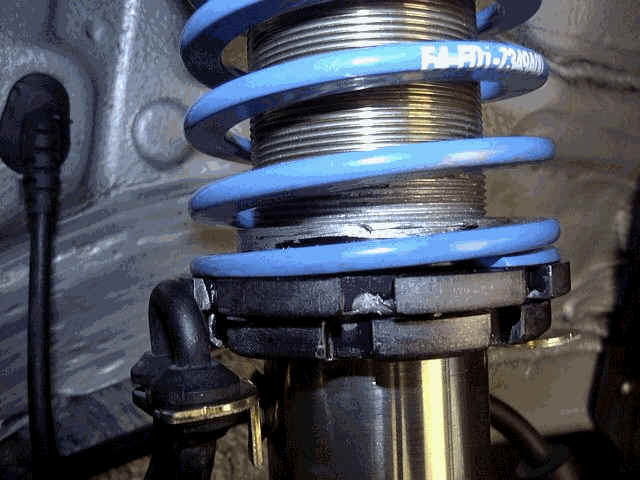
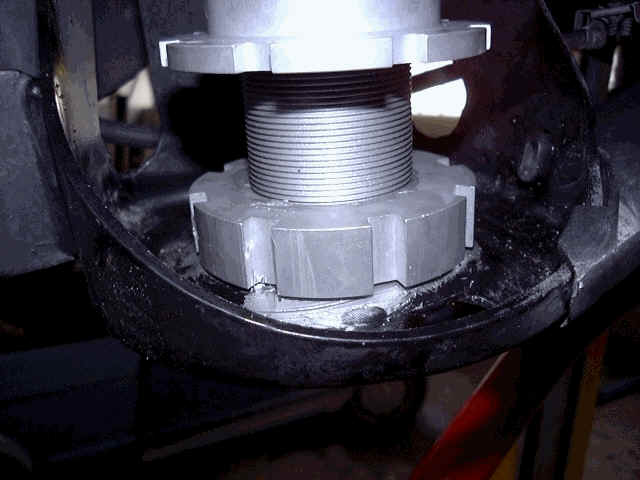
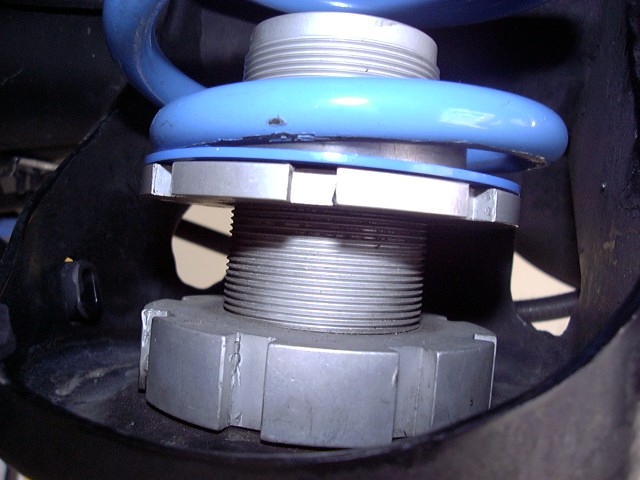
4. Remove the dust covers front the front PSS9 struts and screw on the lock ring and the bottom spring plate (For 45mm lowered, go to the bottom last thread, all the way down). Make sure you have some anti-seize between your lock ring and spring plate, lock in place using spanner wrench. Re-install the dust cover to the strut.
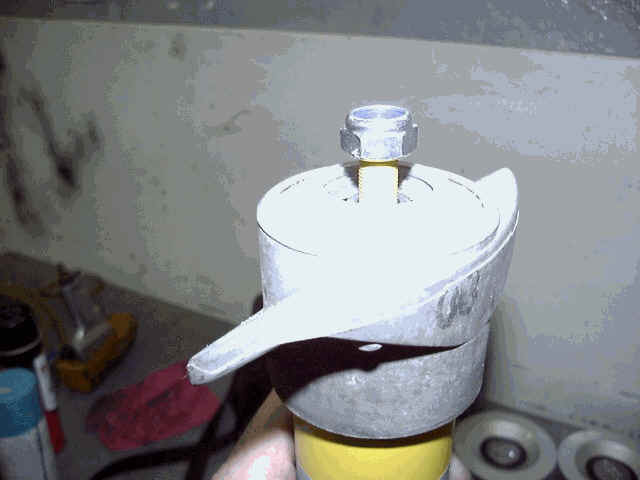
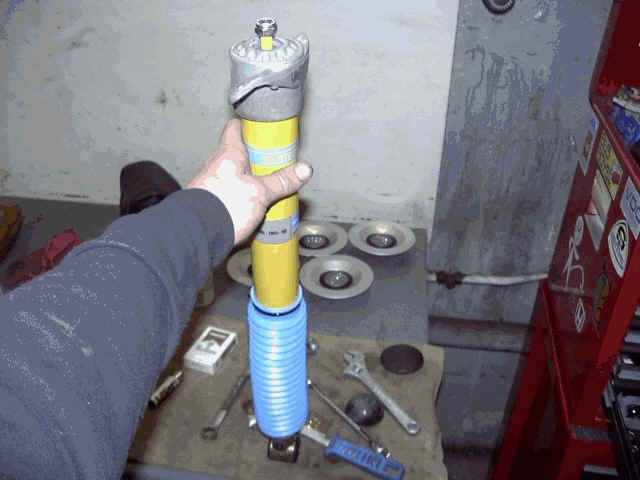
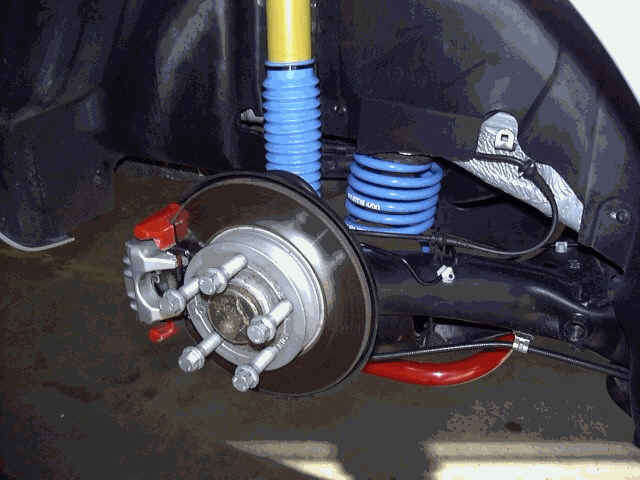
5. Assemble the Coilovers, install the short spring, aluminum coupler and heavy duty spring, apply anti-seize to the top threads of front shock and install the top aluminum spring cap, strut bearing and rubber bushing. Use the special 21mm camber socket and 7 mm Hex wrench to tighten down the securing nut to the strut shaft, use care when fitting these things together as it has been know that even the most experienced mechanic has crushed the strut bearings. If all is well the bushing should spin fairly easy and torque down the securing nut (not too tight). Use the breaker bar and another open en wrench to hold the Hex wrench while torque is applied. Repeat for the other front strut and set desired dampening level (I initially set it at 4).
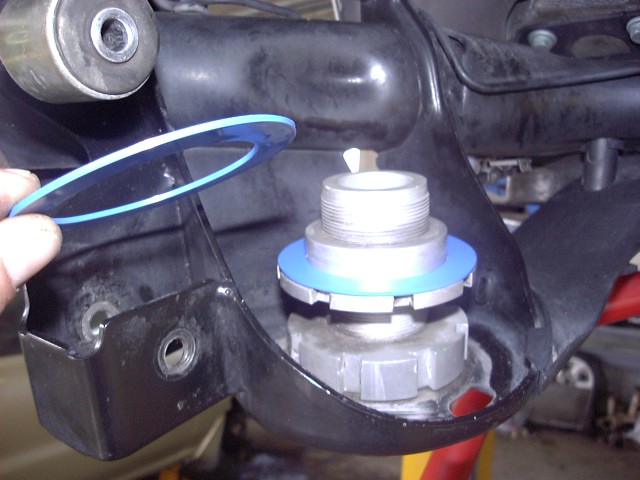
6. Install the rear height adjuster by installing the threaded shaft from the bottom of the trailing arm up thru, install the spring plate flat side up and tighten down on trailing arm with spanner wrench, use anti-seize on the mating surface of the trailing arm. Install the bottom spring plate 2 cm down to achieve a level drop with the front adjust to the lowest thread. I have found that the rear can be looking lower than the front if you go lower than this (2 cm). New! Install the plastic ring on top of the spring plate, see bottom photos.

Install the Front Coilovers:
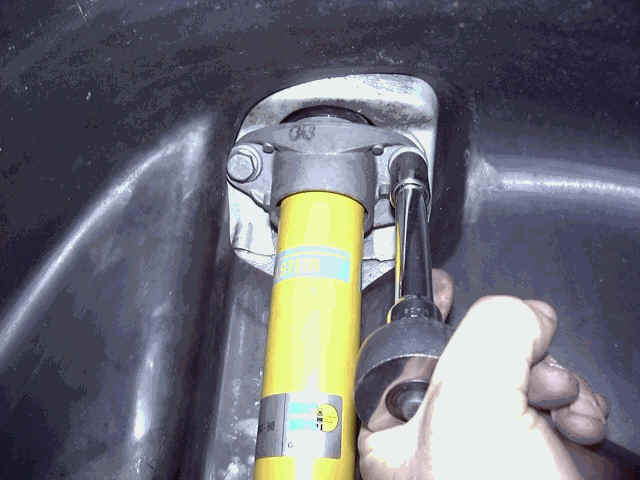
1. Passenger side, install the Coilovers to the top strut tower, by hand tighten the top plate to the bushing, let it hang. Apply upward pressure by lowering the car and supporting the A-arm with a jack stands or uses a jack underneath the A-arm (if car is on jack stands). Use the rubber mallet to seat the lower strut into the bearing housing, I also used a 3 lb hammer to tap the housing and don’t forget to add a little more lubricate there also, it will slide in, make sure you have the thin metal strut lock positioned centered on the bearing housing slot. Secure with the 18mm bolt and nut and torque it down tight. Re-install the CV joint output flange and tighten them down fairly good but not too extremely tight, use anti-seize on these 8mm bolts also.
2. Driver’s side installation is the same as passenger, except for the Axle part.
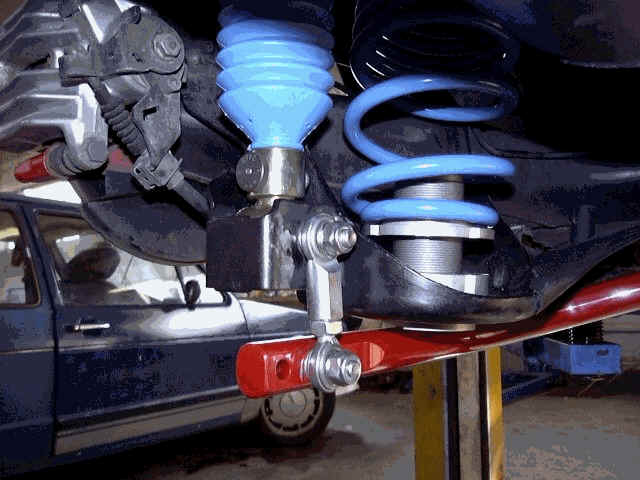
3. Install rear top mounts on the PSS9 rear shocks and secure with supplied nut and using a 4mm hex wrench. Install top of shock with 16 mm bolts but do not tighten all the way up, leave loose. Adjust the dampener setting to the desired level (I initially used 4)
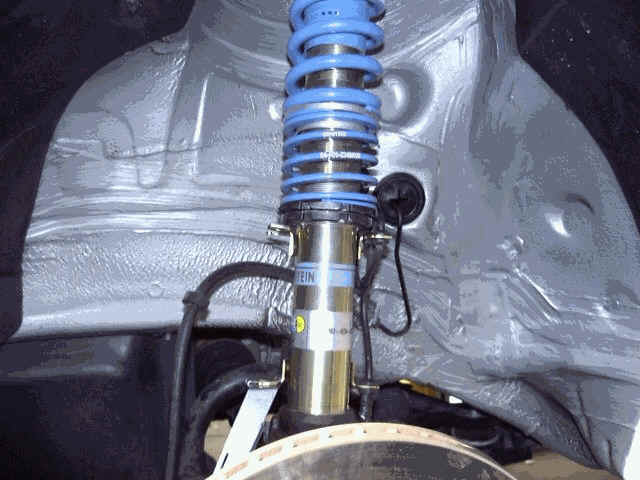
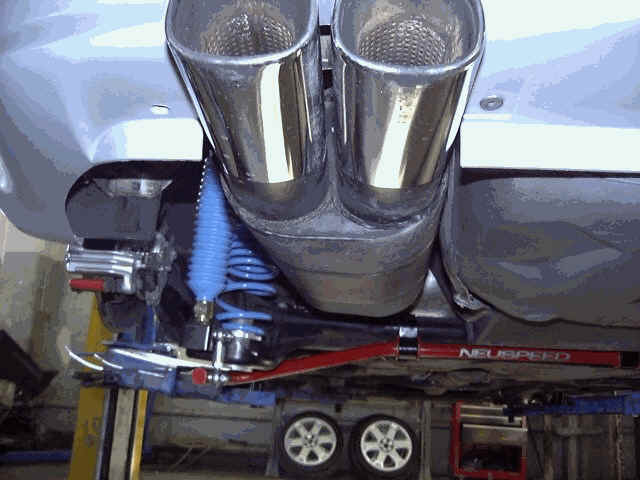
4. Raise the rear-trailing arm with jack or lower car on lift and use a jack stand to lift up the trailing arm. Install springs and align lower shock bolts secure and use anti-seize on the bolt too. After the lower Trailing arm is up and secured to the lower shock mounts than go ahead and tight down the top shock mounts.
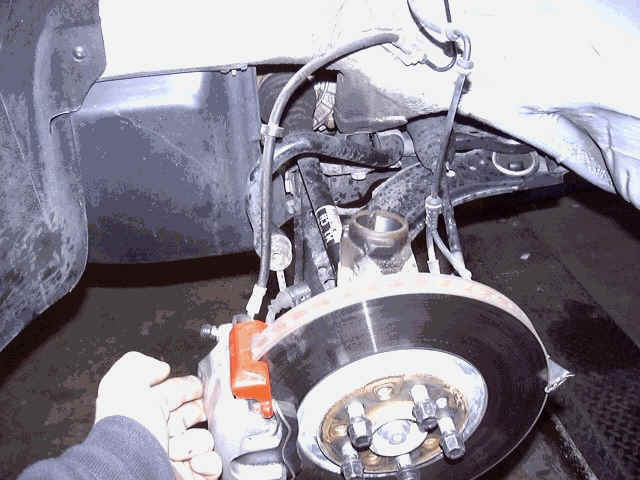
5. Install a Zip Tie at each front strut on the ABS wire to keep it away from the tire and wheel. See picture.

6. Install the wheels and lower the car on the floor. Torque the wheels to 120 Nm using Torque wrench. Use impact and 22 mm socket to tighten the top camber bushing plate nut (supplied with the PSS9). Install the OEM plastic covers for the plates.
7. Go around to each wheel and double check your work, and if desired you can do a few cosmetics now, I did a small touch up on my calipers and also sprayed some zinc on my rear rotors as they started to have some rust on them, I wire brushed the hubs and then spray two coats on them, clean up the rotor surface with brake parts cleaner. Also go ahead and spray down those front rotors as they may have gotten some Liquid wrench on them, let air dry and wipe down suspension parts with a GP degreaser I used 409 Automotive, it seemed to work great. Here are a few pictures of my install.
8. Test drive time! Should feel pretty firm, adjust as necessary.