|
|
|
|
|
Monsoon Subwoofer InstallAuthor: Roger Moore Date written: 9 January 2001 Tools needed for installation Radio pull keys - to remove HU from console Soldiering Iron with soldier and flux T20 Torx Screwdriver #2 Phillips Screwdriver, 1/4" blade (#2) Flat Tip Screwdriver Sharp knife Electrical tape 1/4" socket set Flashlight Drop Light with extension Cord Parts needed: Special connector (yellow plug) - adapter for external Amplifier, provides 4 channel of output to Amplifier and switched 12 volt signal wire to turn on and off a subwoofer, order from Crutchfield or I can get you one for from Germany. This cable must be modified to work correctly with the system. 4 into 2 RCA adapter (Y adapter) RCA cable - long enough to reach from the front to the back of the VW plus a few more for good measures approx 5 meters. Amplifier Power wire - This should be a large enough gage wire to support your Amplifier Fuse for Amplifier mine is a 60 Amp, note this fuse holder must match your wire size, do not splice a smaller type into a larger wire (Not unless you want to be make a "Rice a Roni" car . Ground wire - This wire should be at least the same gage as your Power wire. Amplifier with a Subwoofer function to it usually the B channel, mine is both A and B channels. This function will allow you to select LPF which you can adjust the frequency range the AMP amplifies. Subwoofer, with enclosure. Heavy Speaker wire about 1 meter, if running only one woofer. Self tapping screws Some assorted zip ties Terminal connectors to support the install of the power wires and output to the subwoofer speaker wires.
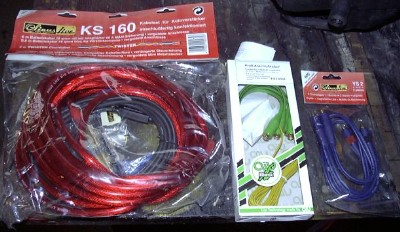
Here is a picture of the Stereo supplies I got before I started this, I will go from left to right and explain each item. Left: Amplifier Installation Kit/ 60 AMP/ with Power wire, 60 AMP fuse block, Ground wire, and RCA cable w/ built in remote wire; middle, Special external Amp adapter for the newer style VW top HU connector (yellow), it has a long remote wire and is suppose to give you 4 outputs.; right Y-RCA, 4 male to 2 female adapter, it converts your 4 outputs to 2. I also required another Y-RCA which 2 female to 4 male adapter, due to the fact that I needed 4 inputs. Prepare the VW: 1. Disconnect the negative terminal from the battery.
2. Remove the Air Box Top cover from the engine bay, remove two Phillips screws and clamp for intake. Then remove the bottom section using 10mm socket wrench and 6" extension. You will also need to remove the quick connect plastic hose.
3. Remove the fuse panel and the driver's side piece of dash board, it just pulls off. 4. Remove the 3 T20 screws from underneath the drivers side of the lower dash (kick panels). 5. Remove the lower panel that covers up the driver's side lower dash. There is a clip here so pull it out and remove this panel also tucks up underneath the outside. 6. Remove the dead pedal using T20 torx screwdriver and lift up (slides up) on it to remove. 7. Remove the hood pull plastic cover. Pull this piece up and out and work the handle out. This piece is also snapped to the lower door way protection trim, but it just snaps off it.
8. Remove the Passenger Side rear quarter panel, first remove the driver's side rear (60/40) 40 split seat cushion by bending the metal bars inward, then remove rear seat back by using a flat tip on the very right side hinge point, there is a movable lock device there. Next, remove the plastic screw fastener in the rear of the panel. Then pull out on the bottom of the panel and feel the fasteners un-pop, once that is felt then lift up on the panel to unhook it from the window lip. Remove the tweeter speaker wire, remove the panel and set on a padded surface so it will not be damaged, inspect door panel for bad fasteners, I noticed some on mine when I did this install and replaced them, these must have been damaged by the VW Factory because my GTI was a cherry.
9. Remove the bottom plastic runner/ lower quarter panel, first remove the plastic screw fastener from the rear section. Then remove three Phillips screws from the speaker area. Then this just pulls up and you should feel it pop off there are about 6 fasteners securing it to the door way, so work one at a time pulling upward.
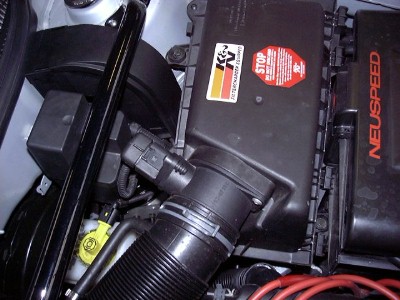
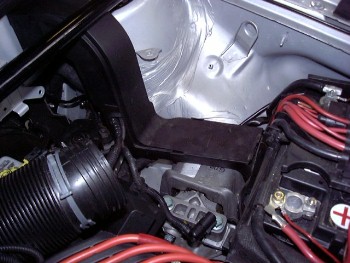
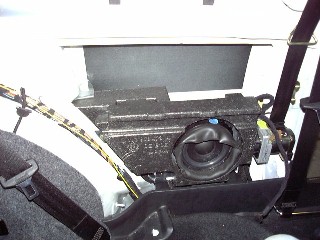
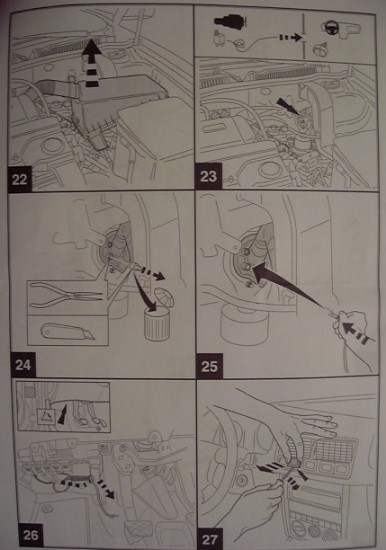
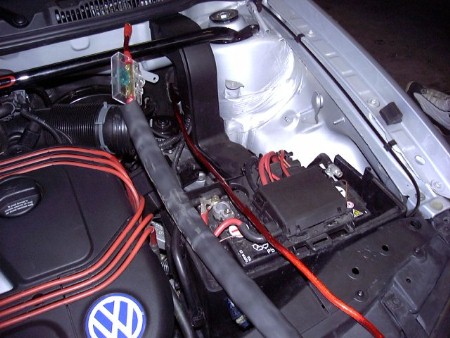
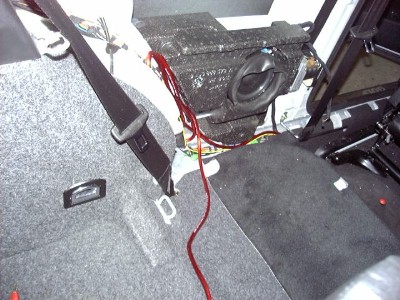
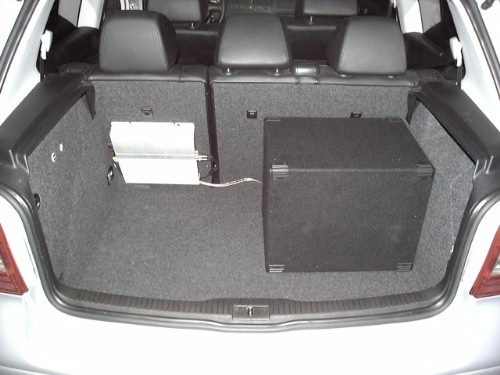
10. Your there! It is time to choose that perfect location. I chose the 40 split seat back as my Amplifier location. You can run the wires to just about anywhere in the rear, once you are at this point. Subwoofer will be a removable Box type unit I purchased from a local Discount Electronics Store ( it was on sale). Installation of wires and the Battery 12 Volt Power: 1. Install the 12 Volt Battery wire, first go to the engine bay and route wire from the Battery Box toward the firewall (see picture). Use a sharp knife to cut a plug out of the rubber wire harness grommet. Push wire through firewall and go to the driver's side foot area and look for the wire. Pull wire through until it is all through the fire wall and the Power wire is routed neatly through the engine compartment, use heat shielded wire looming or heat shrink tubing to insulate power wire and for cosmetics. Route wire to the left side of the VW, first come to the hood pull area and then run along the door way underneath carpet. Come out in the rear by hinge of the rear seat back rest.
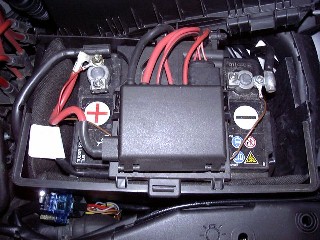
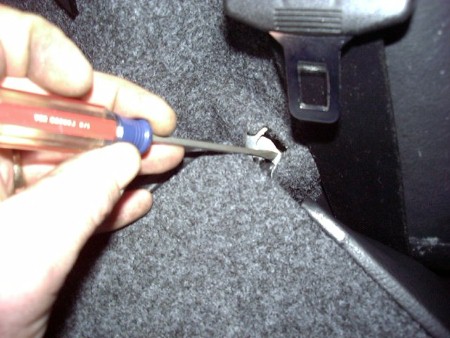
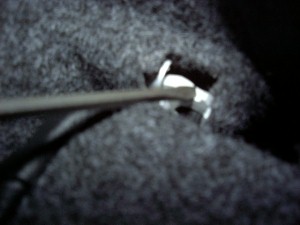
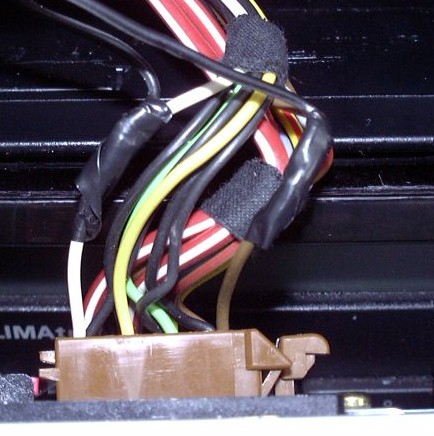
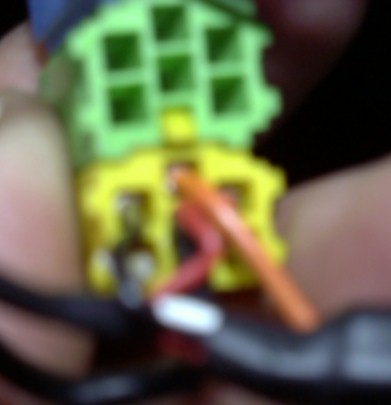
2. Install the Ground Wire, go to the seat belt bolt and secure the wire to this, it is a good ground. 3. Install the external Amplifier adapter (yellow plug) to the radio harness, remove the dummy connector and install the special connect the same way. Note: If after installation you have no signal input to your Amplifier, it is because of the model HU you have, but it doesn't mean the end of the world. Just tap into the RR and LR Signal inputs to the Monsoon Amp. These will give you the same signal. (See Picture)
4. Install the RCA Y (4 into 2) adapter to the four output RCA jacks from the external adapter. Run the Amp remote switch wire the same route as the Battery wire. 5. Install the RCA extension cable, this will connect to the two outputs of the Y adapter and run the same route as the Battery wire and Amplifier remote switch wire. 6. Install the Ampilfier to either the Subwoofer Box or the back of the Seat, or a Special mount. I installed it to the 40 part of the Seat Back. 7. Connect all your wires up using terminal ends and for best results soldier these terminals to your wires. 8. Install subwoofer in either an enclosure or Bass Tube or Special Box. 9. Test your work, see if it is all working right, I didn't have front fade Bass so if you want if you will have to go back to the special VW adapter and move the other two positive wires to the FL and FR positive Monsoon input (brown connector, see HU top for wire explainations). 10. Reinstall the same way except oppsite, make sure your wires are properly tied up with wire ties or Zip Ties. All pieces should be fairly easy to reinstall.
The End Product and the BASS well mine really hits. It is all based on your quality of components. Better Amp and Better Subwoofer will generate awesome results.
Good Luck.
|