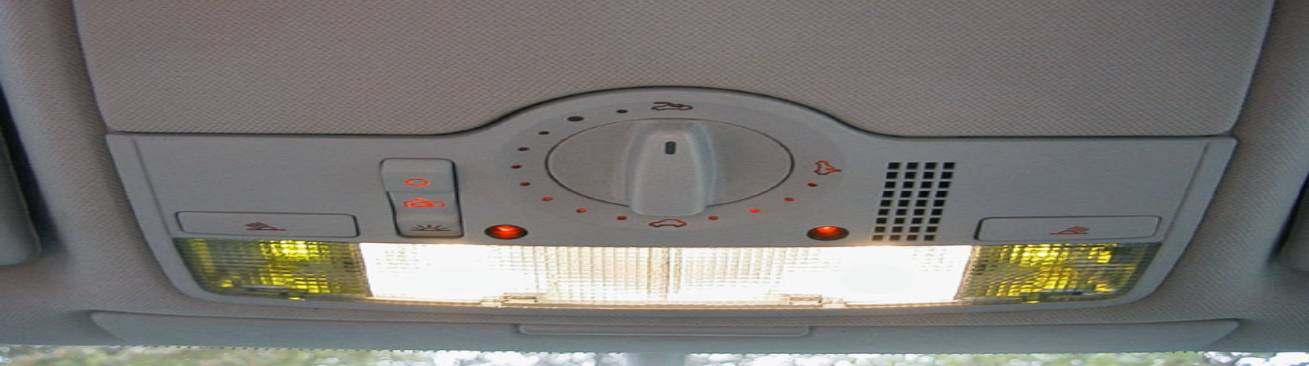
The Passat W8 upgraded dome/map light panel


Disclaimer: This was done on a Passat, and I don't guarantee that the procedure will be the same for a Golf/Jetta. Good luck people, and I've tried to answer some questions at the bottom of this post.


The W8 
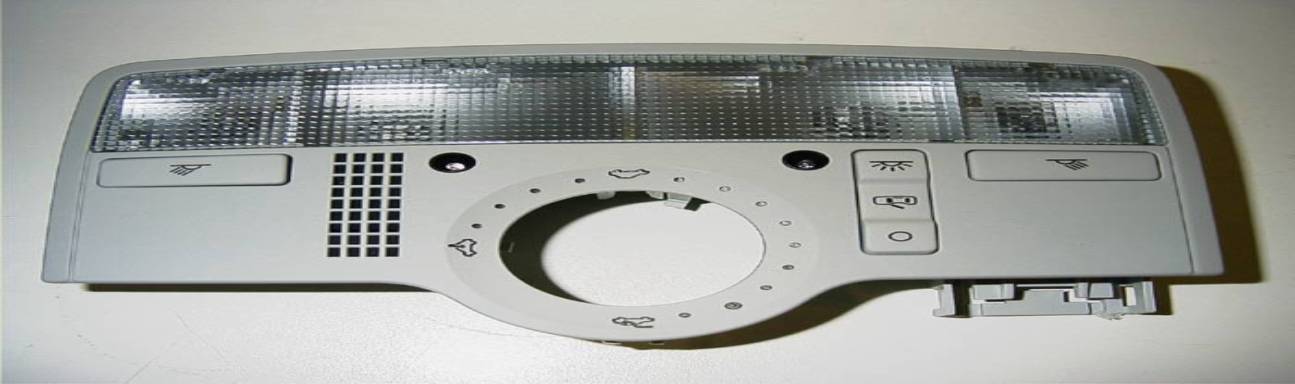
overhead control panel gives you several changes over the standard panel. All of the controls on the W8 panel have backlight icons so that they are easier to find in the dark. The map light switches have been redesigned to be easier to activate at night, and by touch. There are two, red, ambient light LEDs to give a small amount of downward light at night to make lower dash controls more visible. Finally, the map and dome lights have been redesigned to use W5W wedge bulbs and give out more light than the older panel.

Note, there are two versions of the sunroof panel available, A and B. The A version would be for use with the older sunroof rheostat, and the B version for the new "comfort position" rheostat that snaps back. It's on late '02+ models IIRC. Here's how you can tell them apart:


What you are installing:

Installation

Parts List:

W8 Interior light w/Sunroof
* 3B7 947 106 A 2EN : gray
* 3B7 947 106 A Y20 : beige

W8 Interior light w/o Sunroof
* 3B7 947 105 F 2EN : gray
* 3B7 947 105 F Y20 : beige

* 3B0 972 706 : plug 6-pin for light
* 000 979 131 : cables for plug (you need two of these)
* Approximately 7 feet of 18 gauge wire
* 1 3M Scotchlock tap connector
* 4 18~22 gauge electrical butt connectors
* Wire ties

Optional parts:
* 2 W5W Hyperwhite wedge bulbs for dome light
* 2 W5W amber LEDs for map lights

Tools:
* #2 Phillips screwdriver
* Razor knife
* Wire stripping/crimping tool
* Wire cutters

All of this information pertains to a 2001.5 (facelifted) Passat and newer. All other years and models may have some differences in wiring and procedure. Proceed with caution, as you are altering the electrical system of your car. No warranty or claims agains defect are made by the author, and the author assumes no responsibility for damage.

Step 1: Safety:

-Disconnect the negative ground terminal from the battery, to prevent shock, or damage to you car.

Step 2: 
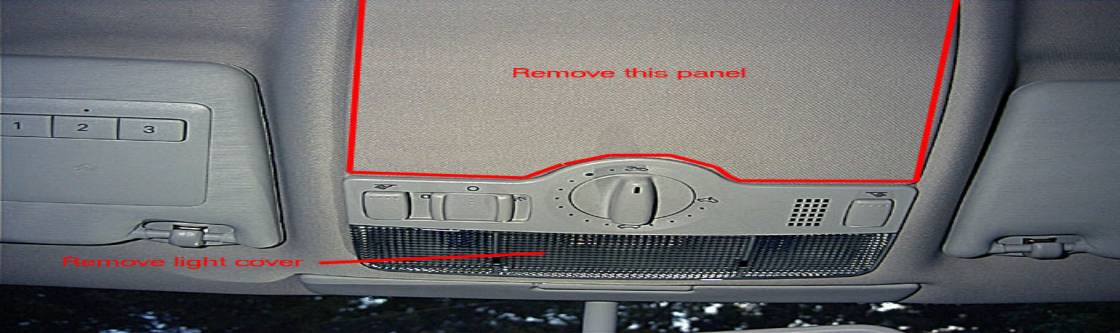
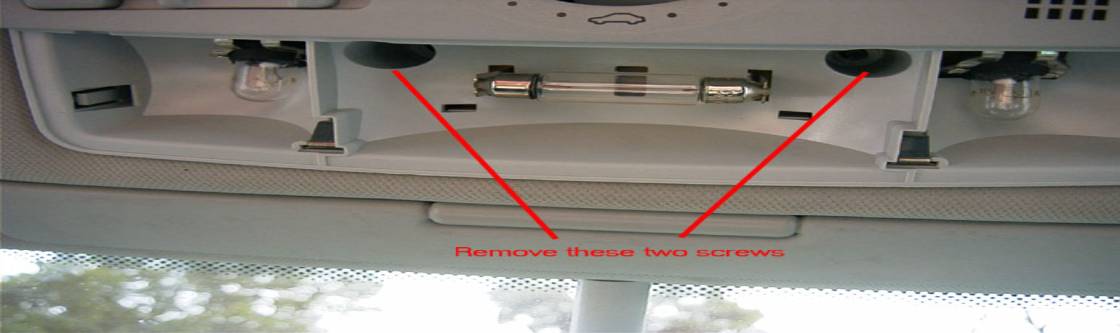
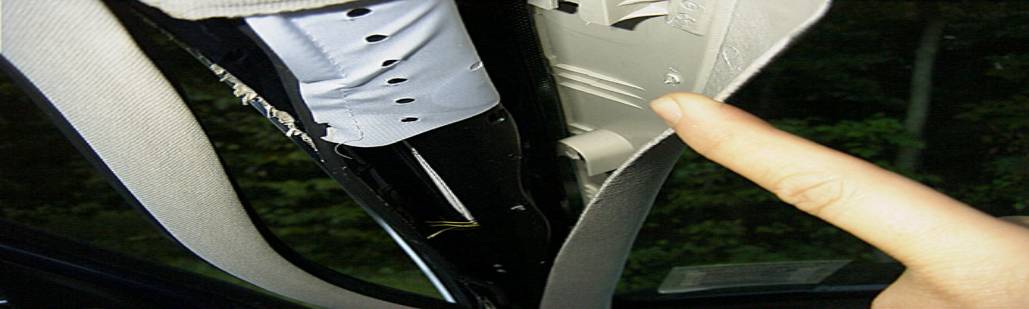
Remove the old light:

- Remove the sunroof emergency access panel immediatly to the rear of the sunroof panel. (see figure 1)
- Remove the clear plastic light cover from the panel by bulling from the front, down, and toward the rear of the car.
- Remove the two phillips screws in holding the panel in place (see figure 2)
- Remove all wiring harness connectors from the control panel
- Test fit the new panel in place. Some modifications may need to be done to other interior components, make sure this part will fit before you proceed!


figure 1: layout


figure 2: Panel screws


Step 3: Convert wiring and plug:

- Insert four of the cables (000 979 131) into positions 1, 3, 4, and 5 on the new plug (3B0 972 706)
- Attach a butt connector to the end of each cable (see figure 3)
- Remove old connector from dome light wiring harness
- Attach the
RED/BLACK (2001.5+) or the RED/BLUE (2001.5-) wire to the butt connector for position 5
- Attach the
BROWN wire to the butt connector for position 4
- Attach the
BROWN/WHITE wire to the butt connector for position 3
- Attach the length of wire, from the parts list above, to the butt connector for position 1
- Positions 2 and 6 remain empty
- Reference figure 4


figure 3: Assembled plug


figure 4: Completed plug wiring

Step 4: 
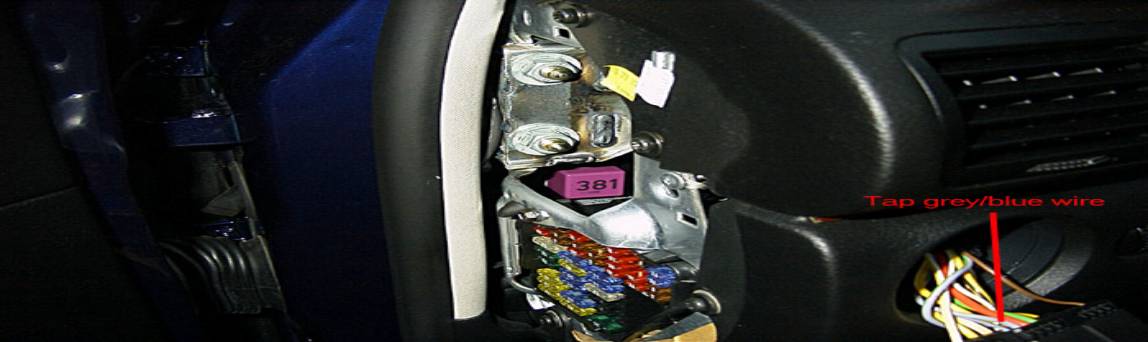
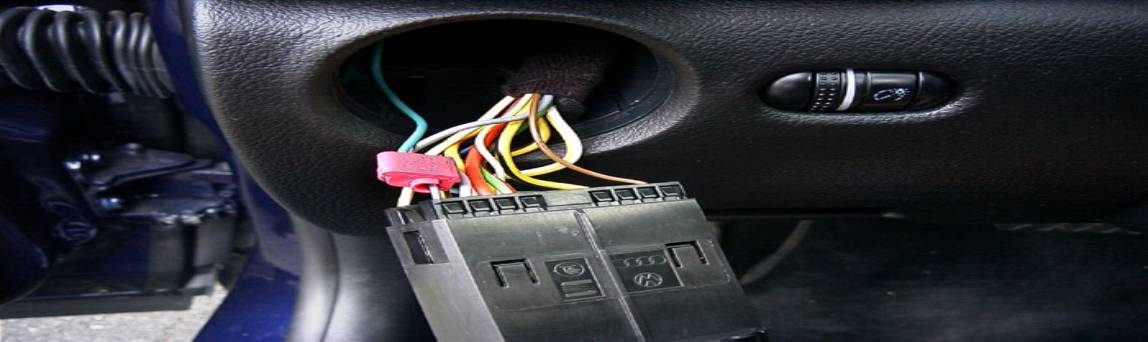
Running the light control wire:

- Remove the cover to the fuse panel
- Remove the A pillar panel seal(see figure 5)
- Remove the A pillar panel cover, the cover slides up about 3/8" then off of the mounting pegs. The retaining strap is very difficult to remove, so I lifted the A pillar cover out of the pocket in the dash and moved it to the side. (see figure 6)
- Remove the middle sunvisor by bulling it down and removing the single phillips screw.
- Feed the long, new, wire from the dome light plug foreward toward the windshield, and along the headliner then down the A pillar.
- Secure the wire to the existing A pillar wiring bundle with cable ties so that it doesn't interfere with the Airbag
- Using the Scotchlock tap connector, attach the wire to the
GRAY/BLUE wire going to the light switch. (see figure 7) Trim to length, if required.
- Attach the new dome light panel to the cable connector, re-connect the battery and test function of the new panel. Ensure that the lights function and dim with the normal swith controls, then disconnect the battery.


figure 5: A pillar panel -
(The white areas in this picture are parts of the airbag)


figure 6: Inside the A pillar -
(The green wire is the new light control wire, which has been attached to the existing harness with wire ties)


figure 7: Light switch connection -
(The pink thing in the lower photo is the 3M Scotchlock tap connector)

Step 5: Final Assembly

- Re-attach the fuse panel cover, A pillar cover, and A pillar seal
- Remove the sunroof potentiometer from the old panel and install in the new panel
- Test the fit of the new panel in place.
- Some minor modifications may need to be done to the headliner to make the panel fit, but this varies by model and year of car.
- The philips screws will not line up with the old screw locations, but the panel has been redesigned so that it is sufficiently held in place with the two metal clips on the side of the panel.
- Re-attach sunroof emergency access panel.

Fin!


FAQs

Q: Why do I need to run the wire to the light switch?

A: Since the original panel was not designed to have illuminated controls, the wire is for the light on/off/dimmer control. Without this wire, the panel lighting will be on all the time.

Q: How do 
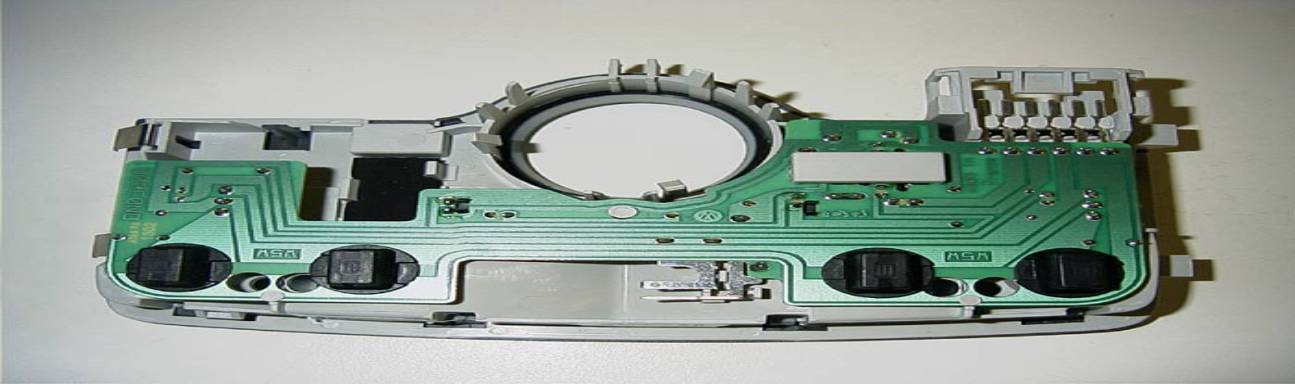
I change the light bulbs in the new panel?

A: The new panel is designed to use only W5W wedge bulbs, rather than different bulbs for 
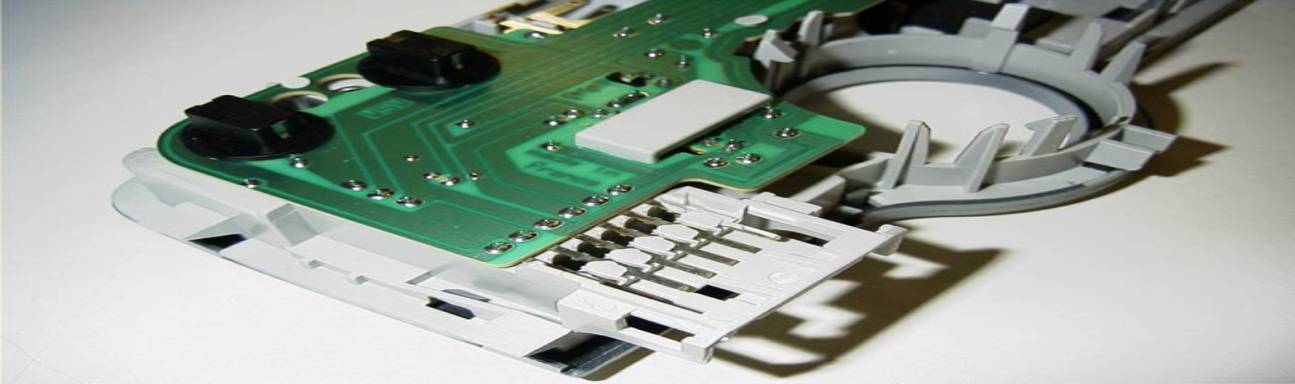
dome and map lights. The panel is also designed to be held in place with two spring clips on the passengers side rather than screws. To change a bulb, pull the whole panel off from the right side and twist the black knobs on the back to take the bulb holder out.

Q: How long does the installation take, and how hard is it?

A: About 25 minutes, and it's really not difficult at all.

Q: What about the Airbag?

A: You really don't have to worry about the airbag, the area you are working in does not really interfere with the airbag, and airbags are designed to deploy if the car experiences an extreme, forceful, jolt at a specific angle. You can't exert this kind of force on the car during this procedure.

Q: How much is it, and where can I get it?

A: Any North American VW dealer can order it for you, and all the parts will set you back about $65.00 total.

_______

JWIL

2001.5 Indigo Blue GLX V6 4Motion
CLUBB5 Profile | My Website